Savory Baked Beans on a Rainy Day

It was a dreary day in Seattle recently and I decided to make a batch of savory beans, slowly baked in the oven with herbs and garlic. And then I looked at my assembled-in-5-min-and-ready-to-go-into-the-oven beans and was inspired to write about it. Perhaps you are wondering where the heck I have been. That’s part of the inspiration too….to let the kind souls who have asked about me know that I haven’t fallen off the face of the earth or succumbed to some weird illness. I’ve been flying almost every other week for work.(Exciting you say? Not really. Though the flight into and subsequent drive from Missoula to Kalispell, Montana was quite beautiful. And wee Grangeville, ID is cuter than I expected it to be…). Plus getting myself slightly over committed with a few work and volunteer projects, and being a hockey mom and then there’s the fact that my year of food blogging put 10 lbs on me from all the thinking, tasting, re-envisioning and re-making (and re-tasting) of food! So I lost inspiration for a while. And seriously…of all the foods to lead to the first post in 4 months, it was the lowly bean? Not so glamorous. But VERY much in the comfort food camp. AND it’s healthy, low fat, high fiber, low glycemic and DELICIOUS! Ok, I’ll stop shouting now. Go make this.
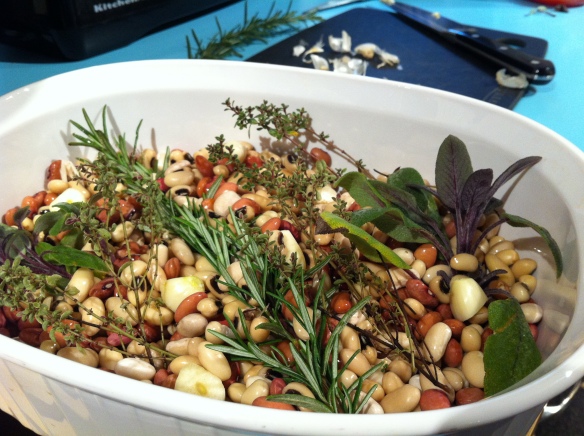
Mixed beans with lots of herbs

Mixed beans with lots of herbs. Though next time I’d use about 1/2 the amount of rosemary pictured here.

Savoury Slow Baked Beans
From my mom, who might have read something somewhere about this method but then just made up her own recipe. She really should have her own blog.

Here’s the general method:
Combine dried beans in a large pot, fill with cold water and soak overnight. Then, drain and place in (several) baking dish(es), add a glug of olive oil and broth/stock of your choice to just cover the beans. Nestle in lots of halved garlic cloves and whichever fresh herbs you want, stems and all, celery stalks, chopped onion. NO SALT. Cover and bake at 350 – 375ºF for 2-3 hours. Check half way, you might need to add more liquid. Beans should be soft when finished. Take out the herb stems and celery stalks, smash in the garlic, onion and season to taste with salt. What you do next is up to you:
-eat in a bowl with a dash of hot sauce
-make some toast and scoop some beans on top
-serve a scoop over rice or quinoa
-puree to make a bean spread/dip
-puree along with cooked vegetables,additional stock or cream for a creamy soup
-use as a starter for a brothy vegetable bean soup

Tips:
Don’t include black beans with others unless you want it to look super dark.
Use rosemary sparingly. It will overpower the other flavors
Don’t salt until beans are soft

Quick Rustic Ratatouille

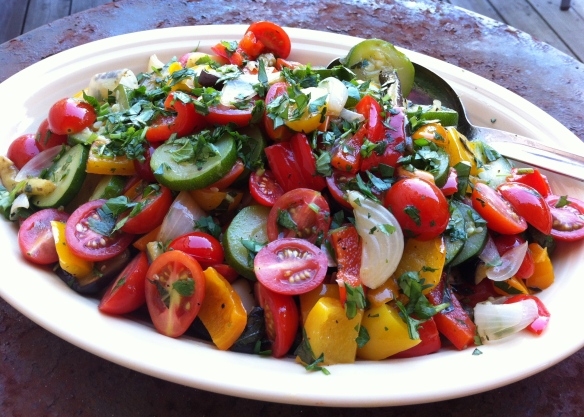
The veggies in the photo above look so fresh don’t they? It’s all the bright colours I think. I bet you have a ton of zucchini and tomatoes in your garden…maybe even peppers and eggplant. Me? None. Zero. Zilch. It was not my gardening year. It was not Eggton‘s gardening year either. Check out her video. Oh, and read her. She’s funny as hell and always includes pictures of her kids dogs and posts yummy recipes.

For me, there was too much work travel this summer and then lack of motivation to get out there and work in the yard. I can only speak for myself because Bob has a garden too (he takes care of the back yard, I deal with the front) but he grew different stuff. Garlic, onions, peas, beans and some weird looking heirloom tomatoes, oh and corn! A few cobs actually grew this year. That was cool. His stuff looks great. Mine sucks. But I’m not competing or anything. 🙂

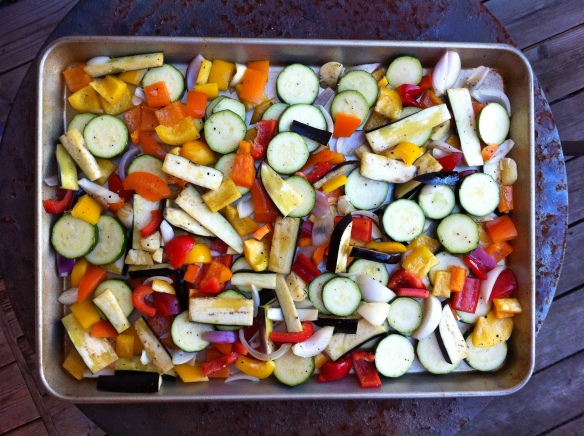
Ok so back to the photo of the ratatouille. The tomatoes and herbs are fresh but everything else has been quickly roasted until tender and the flavours are wonderful. You can make ratatouille any time of year, but there’s nothing better than when everything is in season. (And even better when they come from your own garden but I’ll leave that to you guys, ok?).

This is a quick, rustic rat that’s super simple to throw together. It really benefits from fresh herbs so if you don’t grow them yourself, splurge on them because it will be worth it.

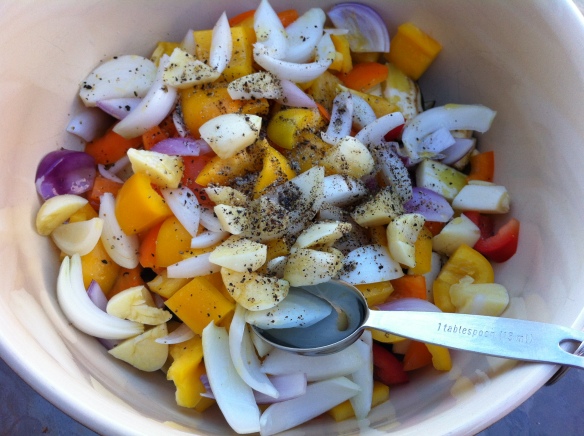
Slice the zucchini in rounds, the eggplants in spears and roughly chop the peppers and onions into ~1″ pieces and toss everything into a mixing bowl as you go. Add salt and pepper. I didn’t measure the salt and pepper but you can see the amount I ground in. Add more if you like.

You dump it all onto a rimmed baking sheet and roast it quickly at high heat. While it’s in the oven you prep the tomatoes and herbs and toss it all together with the hot veggies.

We like ratatouille as a side dish or tossed in pasta, rice or quinoa as a main meal. It makes a great cold pita sandwich with a smear of hummus. I just had it again for lunch tossed with fusilli, some feta cheese and a drizzle of balsamic. Serious yum!

Quick Rustic Ratatouille
Thanks to my mom for this recipe…I’m not sure where she got it but she adapted it and then I did…..) Preheat the oven to 475º.

Cut and toss into a large bowl:
1 small eggplant, cut into thick spears
2 med zucchini, cut in rounds
1 med onion, coarsely chopped
3 bell peppers coarsely chopped
6 cloves of garlic, coarsely chopped (I’m starting to sound like a broken record. Hmmmm…kids today probably don’t know what that means.)

Toss with: 3 tbsp olive oil, salt and pepper and spread out onto a rimmed baking sheet (spray it or spread out a little olive oil on the sheet first)
Roast for 15 min or until the veg are tender.

While the veg are roasting: 
Chop: large handfuls of basil, flat-leaf parsley and cilantro (have about 1-1.5 cups of chopped herbs)
Halve: lots of cherry tomatoes

Take the vegetables out of the oven, stir in the tomatoes and herbs and transfer to a large platter. Enjoy!

Boys, Bikes, and Bonfires…oh, and a quinoa salad.

I remember three things from a summer camping trip when I was little.

1) Arbitrarily deciding I no longer liked apple juice, to the frustration of my mother who had just handed me a plastic Tupperware cup full (with those impossibly tight fitting lids – remember them?).

2) Running up to three tall wooden ‘Huey, Dewey and Louie’ ducks , patting each on the head, and naming them Mac, Two, and Quack after the campground. Only last summer, while roadtripping from Boston to Moncton, NB did I realize that long-ago campground was in Mactaquac Provincial Park (don’t laugh too hard, my French-speaking friends!).

3) Sitting on a picnic blanket at dusk, excited to be outside in my PJ’s WAY past my bedtime, to watch Bedknobs and Broomsticks on a giant outdoor movie screen.

I don’t have any other specific memories of that trip, turns out I was only about 3 1/2, but I remember the magical feeling.

So this year we argued about packed up the car made the 3:05, 3:35, 4:20 5:00pm Fauntleroy to Southworth ferry, and went camping. With two other families, we had five boys made up of three school friends (7yo) plus an older (15) and a younger (5) sib. The 15 y.o was a doll and I hope we do as good a job with E as his parents have done with him!

Fishing with a reed grass pole

Boys are genetically programmed to poke sticks in fires

Blurry boys. Not my fault, they just move too damn fast!

My speedy kid

It was a busy campground, not super-private, with showers and flush toilets and paved paths and is probably a cop-out to backpacking-with-your-tiny-tent-and-purify-your-own-water types. It wasn’t quite the Walmart of campgrounds though, I’ll reserve that for the one we were at a couple of years ago where some woman in full make up and heels was patiently waiting in the bathroom for the deluxe coffeemaker she’d lugged in to finish brewing.

Early morning blueberry pancakes and coffee. Life couldn’t get better.

Now, I am an admitted coffee snob but this is camping people! No electrical appliances allowed! But our camping stovetop perc had seen better days and so we went with the next best thing: Starbucks VIA baby! Normally I wouldn’t be caught dead drinking instant but we thought we’d try it and VIA totally raises the bar. Seriously, it rocked. The only thing better would have been some freshly ground Pike Place Roast or my fave: tall skinny vanilla latte.

This ain’t your mother’s instant.

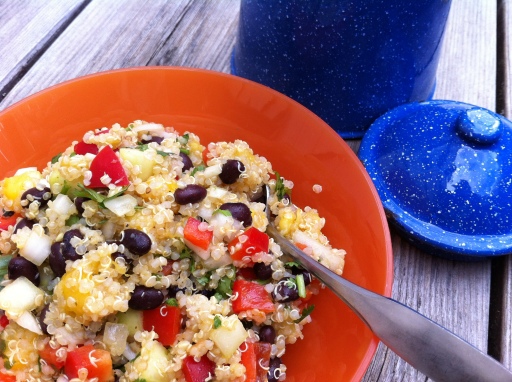
The other smart thing we did was make Julie‘s Curried Quinoa Salad with Black Beans and Mango ahead of time. It travels well, is filling and fresh either on its own or keeping a hot dog company. My picky kid with the suspicious palate wouldn’t touch it, but other kids did! And the beans and quinoa give a ton of protein for the vegetarian who was not having hot dogs.

Yes, those white things are onion, but they’re super mild.

Curried Quinoa Salad with Black Beans and Mango
adapted from Dinner with Julie

1 cup (uncooked) quinoa
1-2 ripe mangoes, diced
1 cup diced cucumber
1 red pepper, diced
1/2 cup diced mild onion or 2-3 chopped green onions
1 cup chopped/torn spinach
1-2 cups chopped cilantro
1 19oz can of black beans, drained and rinsed

Cook quinoa according to package directions and put in a large but shallow bowl to cool. Chop the vegetables and toss with the cooled quinoa. Drizzle with the dressing below.

Dressing:
1/4 cup canola oil
2-4 tbsp vinegar (rice, champagne, wine)
1 tsp honey
1 tsp curry powder
1/4 tsp cumin
Whisk to combine and drizzle over the salad. Watch the amount, you might use more or less depending on how wet you like your salad.

French Onion Soup in Honour of Le Clown

I was worried that by the time I posted this recipe it would be summer weather and no one would want to hear about soup. But yes, its still dreary in Seattle. AND it’s not sweltering in Montreal yet. So I guess the timing is right afterall. Why Montreal, you say? Because this blog post is in honour of this Clown I ‘met’ recently, who lives and blogs there.

Blogging is a weird thing…and presents opportunities to virtually meet all kinds of people. And if you move from the foodie blogs to some of the humour/essayist types of blogs you come across some pretty interesting people, whose comments on other people’s blogs are just as entertaining as their posts. (Not that foodies aren’t an interesting lot of course, but the other bloggers I’m reading are much snarky-er (is that a word?) and thus highly amusing.

Definitely check out A Clown on Fire. This hilarious post about his daughter is the post that got me hooked into the saga of his crazy life and very interesting, talented wife and kids. You’ll find more here and here. You can also find some interesting and clever reads at Gemini Girl in a Random World and Paltry Meanderings of a Taller Than Average Woman, two funny women whose blogs I also follow.

Recently Le Clown took a blogging haitus while sorting out some family stuff and so when he returned I promised I’d blog in his honour and make/blog about his favourite food. Good thing he isn’t totally nuts or I’d have to be blogging about haggis or corn dogs and cotton candy…thankfully he was kidding about those. But “anything cheesy and salty” following a suggestion of French onion soup cemented it for me. A clown after my own heart! And soup it was.

Wonderful soup too. And because the onions steep and brown slowly for a long time in this recipe they, how shall I put this delicately, do not cause distress in those who do not digest onions well.

French Onion Soup
Adapted, but barely, from Smitten Kitchen’s version, which is a streamlined version of Julia Child’s. It’s really worth it to keep the heat on the low end and take the full amount of time suggested to brown the onions. The depth of flavour is lovely. This makes enough for about 6 bowls. 

Soup:
1 1/2 pounds yellow onions – thinly sliced
3 tablespoons butter
1 tablespoon olive oil
1 teaspoon table salt
1/4 teaspoon sugar
3 tablespoons all-purpose flour
2 quarts beef or other brown stock (mushroom works for a veggie version)
1/2 cup dry white wine
pepper to taste

Gratinée (cheesy bread topping)
1 baguette, sliced 1/2″ thick rounds and toasted until hard
1-2 cups grated cheese (Gruyere or Swiss and Parmesan/Romano)

In a large pot, melt the butter and oil over med-low heat. Add the onions, toss to coat them in oil. Cover and reduce the heat to low and let them slowly steep for 15 minutes.

Then, add the salt and sugar, raise the heat a bit, say med-low again, and let the onions slowly brown (30-40 min).  Grab a book, your iPad, glass of wine, whatever, pull up a stool and sit there and enjoy, stirring every few minutes. If you have trouble with that, well….do the dishes, make your kid’s lunch, supervise homework, reorganize the spice rack, alphabetize or color coordinate your cookbooks, whatever floats your boat. Just don’t stray far from the kitchen for the next 30-40 min and stir frequently. They should caramelize to a deep, golden brown.

Once the onions are caramelized, sprinkle in the flour and combine. Cook for 3 minutes.

Add the wine (all at once), then add the stock, a little at a time, stirring after each addition. Season to taste with salt and pepper (keep in mind that the cheese will be salty as well so consider under-salting a little). Bring to a simmer and leave it for 30-40 min.

Finishing:
Pre-heat oven to 325°. Ladle soup into oven-proof bowls. (Place them on a foil-lined baking sheet incase there are spills). Layer/float the baguette toasts on top of the soup bowls and cover in the grated cheese. You can butter the toasts prior to putting them on the soup but I skipped that step and it was still amazing. Bake for ~20 min or until cheese is bubbly and browned. Finish under the broiler if needed.

What do Vampires Have to do With: A Variation on Macco di Fave (fava bean puree)?

We’ve had a reading breakthrough in our house! I guess all it takes is the right book. After baseball, Evan was tearing around the house and I wanted him to settle down a bit so I asked him to sit down and do some reading while I made dinner, and to pick something that was at his level so he could actually read it. (As opposed to, Avengers: The Ultimate Guide to Earth’s Mightiest Heroes, which, though I can see the appeal and the movie is on my list of mindless fun, that encyclopedia-type book is quite advanced).

Lovely lima beans…because I didn’t have fava beans

I came into the living room to tell him dinner was ready and found him reading to himself and not wanting to stop (who are you and what have you done with my child?) for dinner.

“Hey kiddo, since it’s just the two of us for dinner tonight, why don’t you bring your book to the table and I’ll bring mine and we can read and chat about our books?”

He was thrilled. Normally the dinner table is a no book/toy zone so it can be about Having a Conversation. Sometimes ya gotta break the rules.

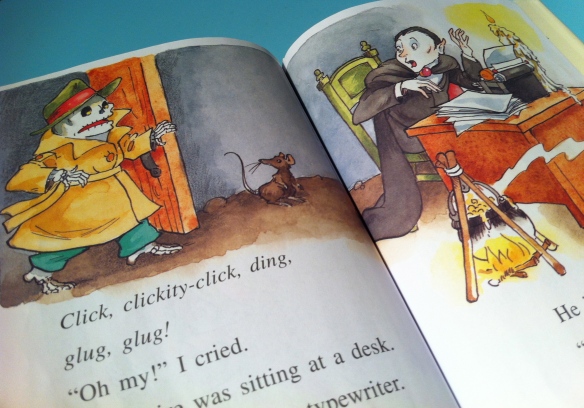
So ace reporter/skeleton, Dirk Bones, joined us for dinner and solved the Mystery of the Haunted House, when he encountered a vampire using a typewriter: “Clickity-click, clickity-clack, ding!” Evan had trouble with the word ‘typewriter’. Understandable. “Mommy, what’s a typewriter? Why does it go ding? Have you ever used one?”

(Flashback to Grade 9 Typing with Mrs. Holroyde k-i-k-space, k-i-k space, d-e-d space, d-e-d space, l-o-l…).

“Yes, honey I’ve used one…this is how it works…” My inept description was ultimately followed by a You Tube demo and then his “...cool, can we get one?!

So back to the story…the vampire was writing a cookbook! Ev thought that was hilarious, especially when I asked him if he thought the vampire should start a food blog. He couldn’t put it down and at the end exclaimed “What a great book!” How appropriate, a vampire foodie. With a recipe for bat foot stew with crispy worm brains to boot. Not quite what I had in mind for dinner, but perfect for my budding reader.

This isn’t exactly bat foot stew, but is a lovely spring soup, picture it served warm but not piping hot, with good bread and a warm breeze on the deck….OR picture it as a warm, satisfying meal during these currently dreary Seattle days….whatever works where you are! To bring this back to the ‘dinnerversions’ theme….no, this soup wasn’t kid-friendly in our house…but we also had outrageously expensive corn on the cob because it was warm and we could pretend it was summer. So the kid ate the corn and had the merest lick of soup…and lots of baguette. C’est là vie.

Macco di Fave (fava bean puree)
Inspired by and minimally adapted from La Tartine Gourmande. It’s a beautiful blog with gorgeous photography. Check it out!

This is a very simple and delicious recipe with only a few ingredients: beans, onion, sage, good pecorino romano cheese. Perfect. Beatrice from La Tartine Gourmande used fava beans, tarragon and parsley in her recipe. I didn’t have fava beans on hand, so I used lima. 

1 red onion, finely chopped
1.6 pounds fresh or frozen lima beans
2 teaspoons finely chopped sage
4 1/2 cups hot water
1 cup grated Pecorino romano cheese, or more to taste
Sea salt and pepper

Sweat the onions in olive oil for a few minutes until soft but not brown, add the sage and beans and stir until fragrant. Turn down the heat to med-low and add the water. Simmer until the beans are very soft and start to fall apart (or puree with a hand blender when soft), then season with salt and pepper and stir in cheese until melted. (Note: adding salt to beans will prevent them from softening so don’t add it until the end).

Garnish with a drizzle of olive oil and more romano and sage.

Penne Primavera

I’ve been having trouble with wine lately. Not the fun kind of trouble, like <insert posh accent> “Oh you simply MUST try this lovely red we picked up on our last visit to Sonoma/Provence/Piedmont…such a PITY it’s our last bottle”. Or, “...we have GOT to get our architect to design us a larger wine cellar…”  As if.

No, my wine troubles are more like this conversation between me and my body: “WTF body, you used to love red wine…remember the time we toured little wineries in Sonoma with Bob? Remember when we all learned what a real zinfandel was? What happened?”

My body answers, “What do you want? We’re 43 now. We can’t eat whatever we want and still feel 20-something! Especially since you can’t be bothered to exercise me very often. Geez. No respect”.  Gulp, ok, guilty on the last charge. My punishment? Reflux,  a rapid heartbeat and big time flushing.  Sigh. But a least I can still cook with wine!

And no self-respecting red sauce should be without a healthy dose of red vino to deglaze the pan and add flavour depth. Experts disagree on how long you need to keep your dish cooking to burn off the alcohol, some say 20-30 seconds and some say it must boil for several minutes or simmer for a few hours! So if alcohol is something you really need to stay away from, check out this handy table. It’s from Wikipedia so use it as you will…I tried to link to the US Dept of Agriculture Nutrient Laboratory who did the study but the link was corrupt. Fortunately for me, I don’t have to worry that much about it but I thought it was interesting.

So throw some veggies in a pan with some onion, garlic and olive oil, add some basil and oregano, deglaze with some wine and a can of diced tomatoes and go to town!! You can add a touch of cream near the end if you like….or not. It’s super yummy and perfect for spring.

Pasta Primavera

3-4 cups diced vegetables (eg peppers, zucchini, asparagus, mushrooms, snap peas, broccoli, cauliflower etc)
1 onion, diced
1-2 cloves garlic, minced
1 19oz can diced tomatoes
1 19oz can tomato sauce (ie pureed tomatoes)
2 tsp dried basil (or 2 tbsp chopped fresh)
2 tsp dried oregano ( or 2 tbsp chopped fresh)
1/3 cup red wine
pinch sugar
salt and pepper to taste
2-3 tbsp heavy cream (optional)
Short pasta, like penne, farfalle, rigatoni.

Dice onion and vegetables roughly the same size. Toss in a deep skillet with some olive oil and a few grinds of pepper on med-high heat. Sauté for 4-5 minutes and add the minced garlic and the herbs. Sauté for another 2-3 minutes. Add wine and let it bubble for about a minute and then add in the tomatoes and a pinch of sugar (and cream). Turn down the heat, add the cooked pasta, salt to taste, and let the sauce simmer for a few minutes to allow the flavour to permeate the pasta. Garnish with grated parmesan and serve.

In our family, we fish out the pasta for Evan so he gets all the flavour but none of the ‘lumps’ of vegetables. We give him a small dish of the vegetable sauce in a separate dish that he usually doesn’t touch but it’s served to him anyway. One day he’ll try it…

Fast Personal Pizza

Maybe it’s because I’m gearing up for a lot more work travel over the next few months and summer is just around the corner and we haven’t figured out which summer camps Evan will be doing…regardless of the reason, it seems we’re in fast forward! Fast forward often requires fast food….but only in the figurative sense. We don’t eat a lot of Fast Food in our family…(though it seems like road trips and McDonald’s go hand in hand and I have no problem with that!)

But make-your-own pizza…that can be really fast and still great. We often get ready-made pizza dough from Trader Joe’s but that still requires rolling it out etc. The BEST super fast mini-pizza vehicle I’ve found, thanks to my mom who tuned me onto it, is Greek style pita. There is no pocket, it’s designed for wrapping around souvlaki or tearing up and dipping in hummus or tzatziki (hmmm…I sense a future post).

However, it also makes terrific pizza crust. Spread your favourite jarred sauce and favourite toppings on the bumpy side. Put it straight on the oven rack flat side down and it gets nice and crisp. About 8-12 minutes on 375° depending on your oven and when you consider your pizza ‘done’. Then, if you’re me, try to get it on the table without a “Mommy, can you finish taking pictures so I can eat it now?”

Hmmm....seems this lunch was particularly orange!

Butter Beans with Leeks and Thyme

Evan will not eat this. Not one bite. But I guess I don’t really blame him, being 7 and all….the texture of beans is something that doesn’t come easy to many kids.  No matter, it was terrific for the adults and with the meal rounded out by a roast chicken (which he does eat), and some steamed broccoli (which he eats when he’s in a good mood, but only out of “just one bite” obligation), it all worked out in the end.

You can start with canned butter beans, but I much prefer starting with dried if the thought crosses my mind in enough time to make it happen. They hold their shape better and aren’t as mushy as canned beans can get. Soak them overnight in cold water or do a quick boil and then soak for 90 min or so. The bag of beans will have instructions. But seriously, you just throw the beans in a mixing bowl with cold water and leave it. The next morning just drain them and put them in the fridge until you’re ready to do more with them.

I sweated the leeks and a clove of garlic (kept whole) in a bit of butter and olive oil, until the leeks were soft, added the thyme, salt and pepper and a good glug of white wine. Then I tossed it all with the beans, some stock, a bit of heavy cream (just a bit) and popped it in the oven for about 40 min. Easy. All you need to do next is chill for a while until its time to cut up the already roasted chicken you got at the grocery store (brilliant invention). AND if you go with bag o’ broccoli, it only takes about 3 minutes to steam it.

I totally forgot to take photos of the butter beans as they came out of the oven. But they looked pretty similar, just deeper in colour and creamier.

Butter Beans with Leeks and Thyme

2 cups dried butter beans (or 2 cans, drained and rinsed)
2 leeks, white and a bit of green only
2 tsp dried thyme
1/3 cup dry white wine
~1/2 cup broth/stock (if you’re using canned beans you may only need a bit to keep them moist in the oven)
salt and pepper to taste
2 tbsp heavy cream (optional)

Slice/dice the leeks and toss in a frying pan with a bit of olive oil and a clove of garlic (whole). Stir fry about 3-5 min on med-high, then add thyme and stir around until fragrant. Add wine (pan should sizzle) and let it bubble for a couple of minutes. Meanwhile, put the drained beans in a casserole dish, then pour the leeks over top. Combine well. Stir in stock and cream, cover and put in the oven at 375° for about 40 minutes.

Penne with Mushrooms and Spinach

Once again the day got away from me and I found myself at 5:30pm staring into the fridge trying to figure out what to make for dinner but didn’t really feel like cooking. Sigh. But instead of turning to old standbys grilled cheese or soup and toast I managed to pull together a pretty decent pasta dish without a huge amount of effort.  Don’t get me wrong, we love grilled cheese and Pacific Natural soups are a staple in our house (Roasted Red Pepper and Tomato is awesome) but I really wanted pasta and also had this bag of mushrooms that needed to be used up.

I figured I could make a similar wine-y broth to the farfalle I made recently.

This came together in about 20 minutes thanks to bag o’ mushrooms (sliced) and bag o’ spinach. The most work was slicing the shallots. And it was really yummy, with a deep mushroom flavour.

To make it Evan-friendly, because he would balk at a bowl of pasta with all that ‘stuff’ in it,

I scooped out some penne that had been simmering in the veggies and broth and added some grated parmesan so he’d get all the flavour without the ‘bits’. I figure, it’s the same meal, just adjusted a bit, which I’m okay with. I mean, we can avoid being too accommodating but still be considerate of his finicky palate, right? Everybody wins. Then I put some of the braised veg on the side, which he didn’t try, but that’s ok.

Penne with Mushrooms and Spinach

Truth be told, I didn’t measure anything when I made this so you may want to add more or less liquid to deglaze and braise depending on the amount of mushrooms and spinach you use. The one third – two third ratio of wine to broth works well and just add more if 1 cup total volume is not broth-y enough. Remember that the mushrooms give off a lot of liquid too though.

1 8 oz bag sliced crimini mushrooms (roughly 1/2 lb sliced)
1 6 oz bag baby spinach
1 large shallot, sliced (about 3/4 cup)
1 clove garlic, minced
1/3 cup dry white wine
2/3 cup chicken or vegetable stock
fresh parmesan cheese, finely grated
salt and pepper to taste
cream to taste (optional)
Pasta (we used Trader Joe’s whole wheat penne)

In a large skillet on med-high, saute mushrooms and shallots in a bit of butter and olive oil, about 5 minutes. Add garlic and cook for another minute. Deglaze by adding the wine and broth, then dump in the spinach, a good grind of pepper and salt (to taste), then cover and reduce heat to simmer for 7-8 minutes.

When spinach is very wilted, stir to combine and add pasta to the skillet…more or less depending on the pasta to veg ratio you like. Add a drizzle of cream if you want, and let it simmer a bit longer until some of the liquid reduces. Stir in 1/2 cup fresh grated parmesan and serve immediately.

Farfalle with Snap Peas, Pine Nuts and Currants

It was a Mommy and Evan night since Bob had a meeting to go to, and Evan was pretty excited about it.  Much as he loves his Daddy, having Mommy to himself is definitely a treat in his eyes! Particularly since work had me traveling a fair bit last year. I’ll take it…I’m sure it won’t last too much longer since he’s seven already. Sigh.

So my imaginative whirlwind of a boy was acting his most grown up and it was lovely to have him sitting at his little kitchen desk doing his homework on his own while I made dinner. Then he set the table and tidied up his toys. O.M.G. I’m sure he’ll be back to normal tomorrow. I couldn’t persuade him to try this dish, so he had his farfalle with pesto instead. Given that he’s usually partial to penne it was nice to see him try out a different shape at least. Then he got into his PJs and we spend the next hour reading Harry Potter 2. Nice.

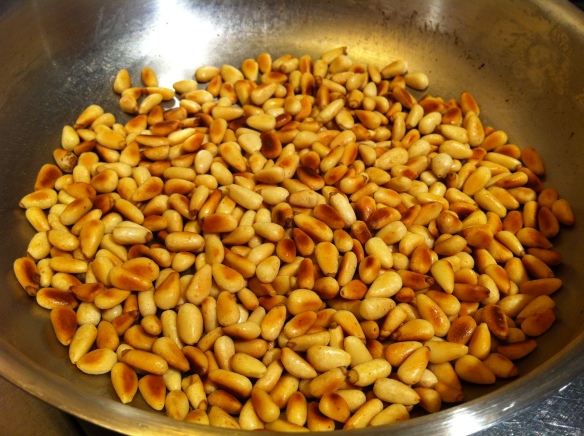
It is totally worth toasting the pine nuts for this recipe. It doesn’t take long, only 3-5 minutes…any longer and you risk burning them anyway. Just put a bunch in a frying pan on medium high without any butter or oil. Keep an eye on them and shake them every so often. Once they start to darken it will go fast and they will continue to brown once you take the pan off the burner so if they’re the right colour, dump them in to a bowl. Make a bunch and then store them in the fridge and toss them in salads. Yum!

I adapted this recipe from an America’s Test Kitchen 30-Minute Suppers magazine, which called for broccoli and oricchiette (shells), neither of which I had so we ended up with farfalle and snap peas.

It was quite good. Next time I will use broccoli though because the tops of the ‘trees’ are perfect for trapping yummy melted, wine-soaked Parmesan. Basically use equal amounts of sliced onion, mushroom and veg and 1/2 that amount of pine nuts and currants. Use more or less pasta, as you like. Definitely don’t skip the currants…they add a subtle sweetness on top of the wine and garlic that’s fab!

Table for two...complete with candles and penguin.

Farfalle with Snap Peas, Pine Nuts and Currants
Adapted from America’s Test Kitchen 30-Minute Suppers, Spring 2011.

1/2 red onion or 1 cup sliced french shallot, sliced thin
1 large/2 med garlic cloves, minced
1/2 cup pine nuts, toasted
1/2 cup dried currants
1/3 cup white wine
2/3 cup chicken or vegetable broth
1 box farfalle
1 cup snap peas cut on an angle in small pieces
1 cup sliced mushrooms
1 cup fresh grated Parmesan cheese
Salt and pepper to taste

Gently toss pine nuts in a frying pan with no oil over med-high heat until slightly darkened. Bring pasta water to a boil and start to cook pasta. You’ll toss in the snap peas to cook with the pasta for the last couple of minutes.

In a large skillet over medium-high heat, cook onion and mushrooms until softened. Add garlic and pine nuts and cook, stirring frequently, until garlic is fragrant — about 1 minute. Add currants, white wine and broth and simmer for a few minutes until the liquid reduces a bit and the pasta and peas finish cooking.

Drain the pasta and peas and toss them into the skillet along with the Parmesan cheese and salt and pepper to taste. Stir to combine. Serve immediately. Makes quite a bit.